 VapuAI
How AI Image Inpainting Works (Generative Fill, Explained)
You have a photo that is almost right. One thing is wrong. A trash can in the corner, a logo you cannot use, a blank wall that needs a lamp.
Inpainting is how you fix that one part without redrawing the whole picture. You mark the spot, say what should be there, and the AI paints it in to match the rest.
It is the same idea a lot of tools sell as “generative fill.”
What is AI inpainting?
AI inpainting is filling a selected part of an image with new, believable pixels. You draw a region, called a mask, describe what belongs there, and the model generates only that patch so it blends with everything around it.
“Generative fill” is the marketing name a lot of tools use for this kind of edit. Adobe made it popular. It usually means inpainting, and in some tools it covers outpainting too.
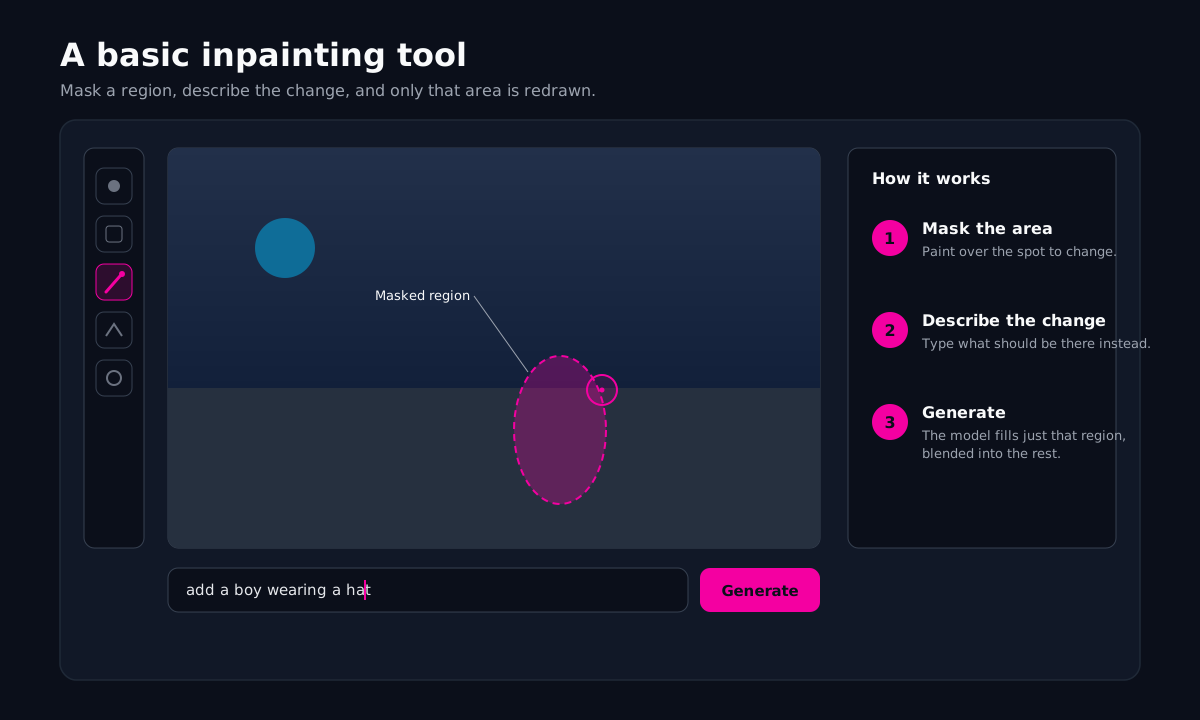 A basic inpainting tool: mask a region, describe the change, and generate.
How does AI inpainting work?
Most inpainting today runs on a diffusion model, the same kind of model behind text-to-image tools. It works in three moves.
First, your mask tells the model which pixels it may change and which to leave alone. Second, the model reads the pixels around the mask, plus your prompt, to understand the scene. Third, it fills the masked area by starting from random noise and refining it step by step, until the new patch fits the lighting, texture, and edges next to it.
Only the masked patch gets redrawn, then blended back into the original so the rest of the image stays as it was.
Inpainting vs outpainting vs generative fill
The difference comes down to where the new pixels go.
- Inpainting fills a region inside the image. The canvas size does not change.
- Outpainting adds new canvas outside the original edges, so the picture gets wider or taller.
- Generative fill is a marketing umbrella. In most tools it covers both inpainting and outpainting under one button.
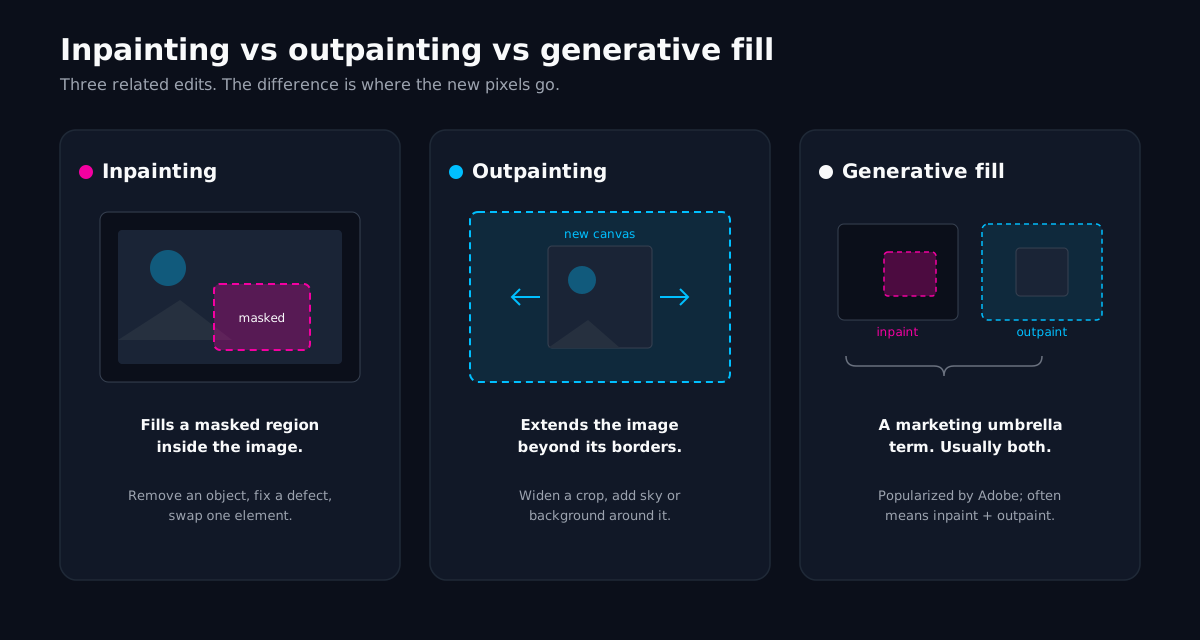 Inpainting fills inside the image, outpainting extends beyond its edges, and generative fill usually covers both.
What is AI inpainting used for?
Inpainting is for the times a photo is almost right and one part is wrong. A few common jobs:
- Remove something. A photobomber, a sign, a stray cable, a coffee stain.
- Fix a flaw. A blemish, a scratch, a small artifact left by an earlier edit.
- Swap one element. Recolor a jacket, replace a prop, put a different sky behind the same scene.
- Clean a background. Fill the gap when you crop or straighten a shot.
Swapping one element is a clear example. You mask what is already there, describe what should take its place, and the model paints the new thing in to match the scene around it.
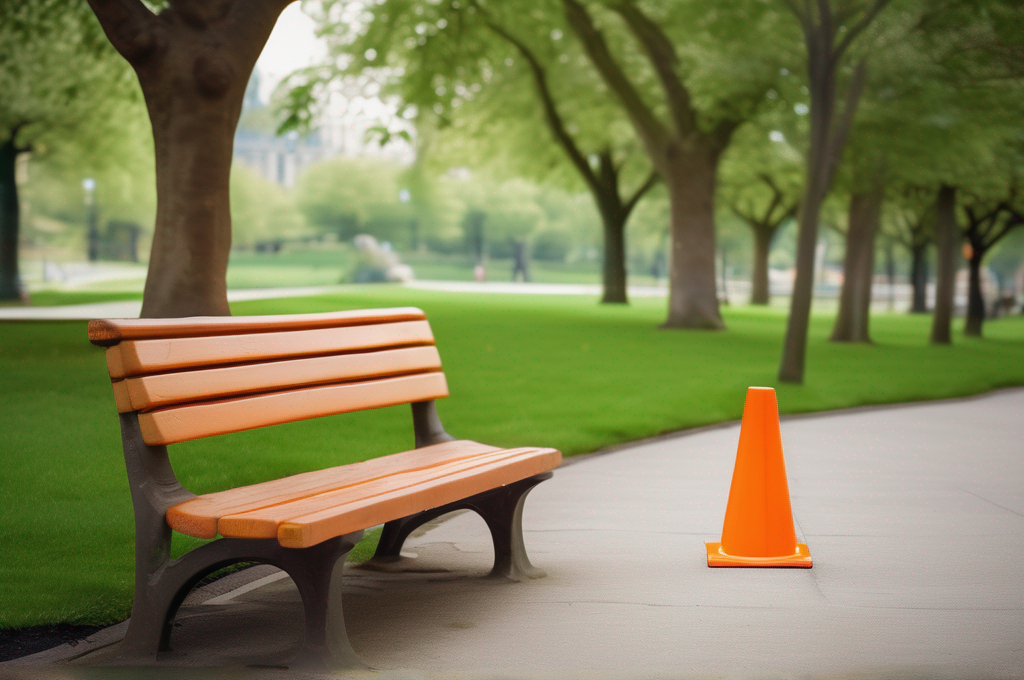 Before: a traffic cone on the path.
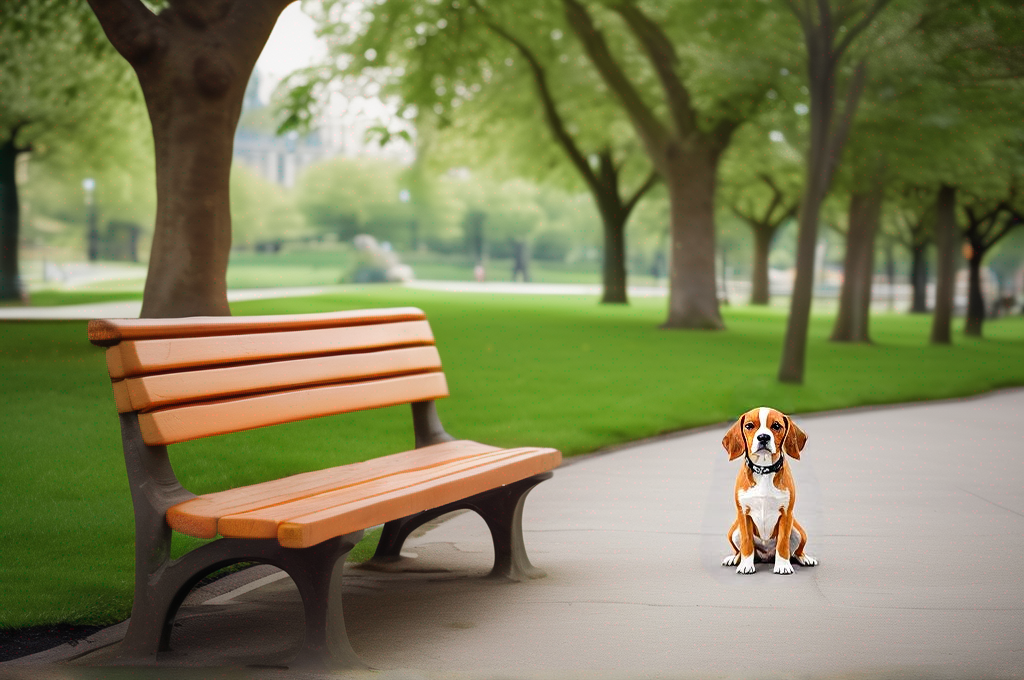 After: inpainting replaced the cone with a dog, matched to the scene.
Where does AI inpainting struggle?
Inpainting has limits. It struggles most at the edges, and with detail your eye knows well.
- The seam. If the mask is too tight or too loose, the patched area can show a faint border where old meets new.
- Faces, hands, and text. Small, structured detail is hard, so a regenerated face or a line of text often comes out slightly off.
- Big holes. The more you mask, the less context the model has, so large fills drift from the original look.
- Light and angle. A new object has to match the light direction and the perspective, and that match is not always right on the first try.
Most of these get better with a cleaner mask and a shorter, more specific prompt.
Try inpainting in VapuAI
In VapuAI’s Studio, inpainting is the Inpaint tool. You upload an image, brush over the part you want to change, type what should go there, and generate. Only the masked area is redrawn, and the rest of your image stays put.
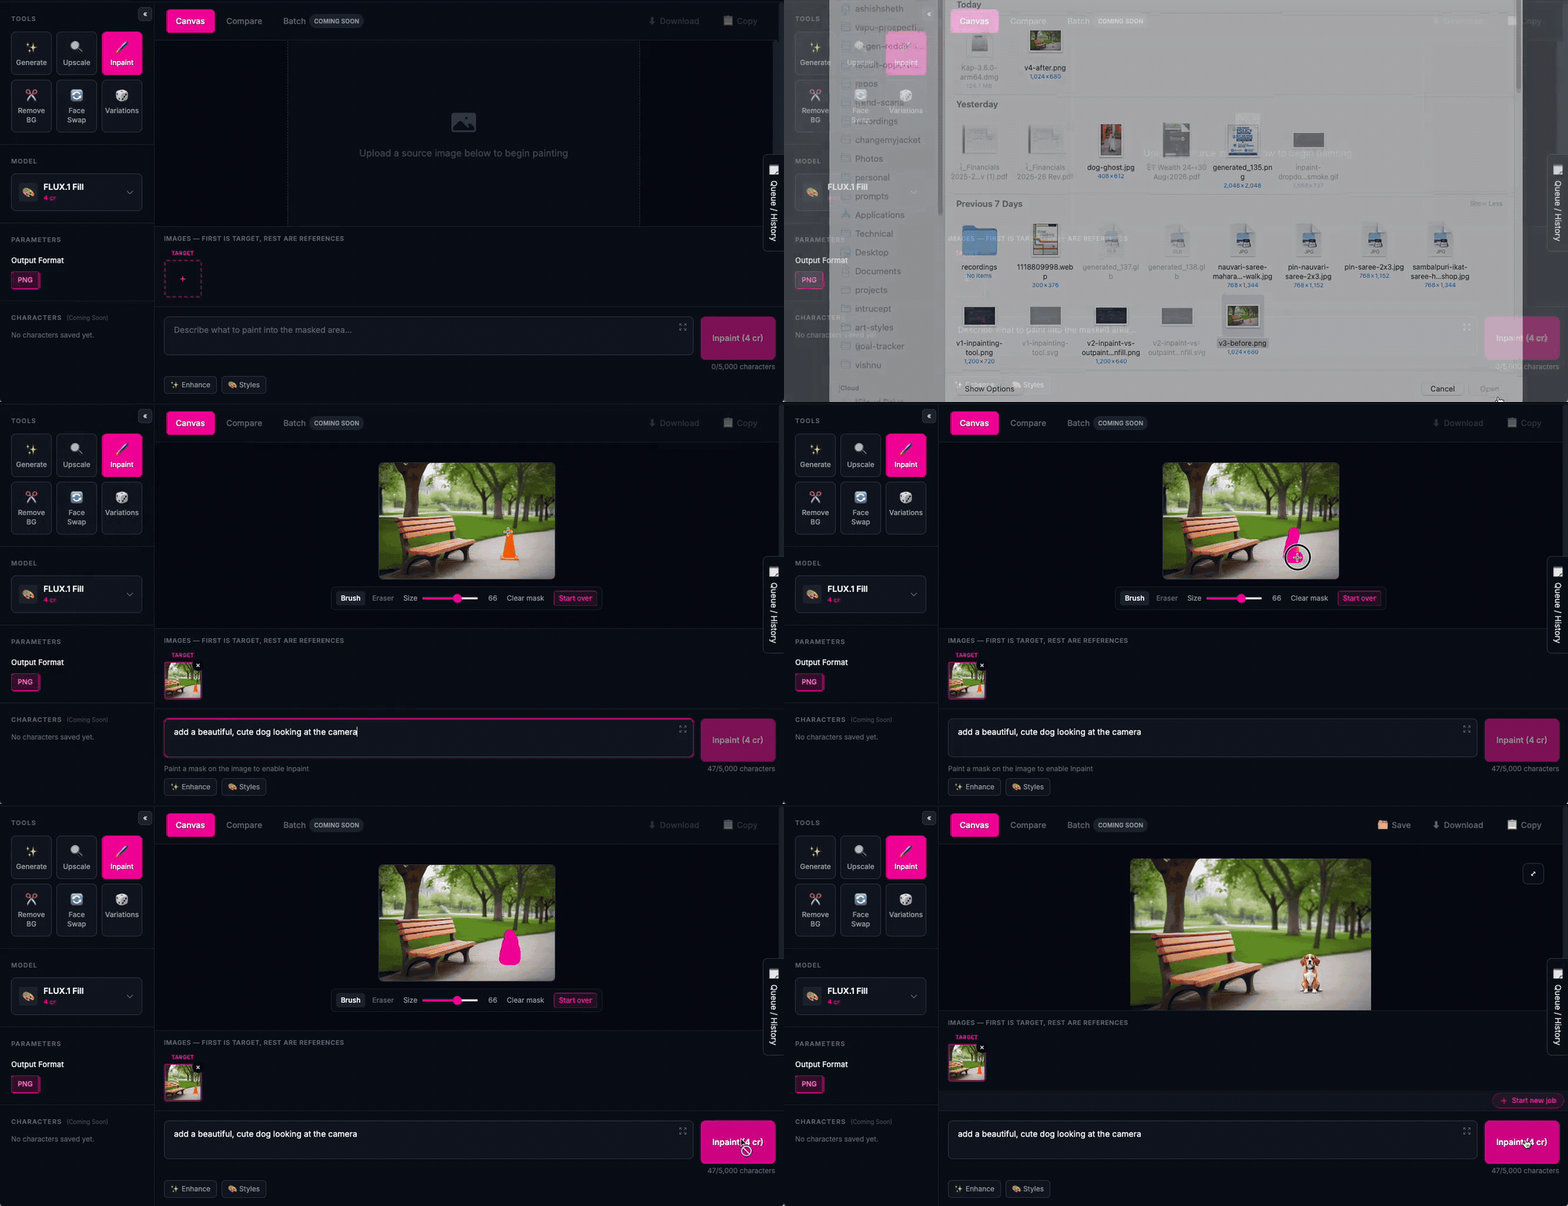 The Inpaint tool in VapuAI Studio, from mask to result.
Want to fix one part of a picture without touching the rest? Open the Studio and paint your first mask.
Further reading
Want the technical version? These papers trace inpainting from early deep learning to today’s diffusion models.
The foundations:
- Context Encoders: Feature Learning by Inpainting (Pathak et al., 2016): an early deep-learning method for filling missing regions.
- Free-Form Image Inpainting with Gated Convolution (Yu et al., 2019): GAN-based inpainting with free-form masks.
Diffusion, and inpainting with it:
- Denoising Diffusion Probabilistic Models (Ho et al., 2020): the diffusion method behind today’s image models.
- High-Resolution Image Synthesis with Latent Diffusion Models (Rombach et al., 2022): the latent-diffusion work behind Stable Diffusion.
- RePaint: Inpainting using Denoising Diffusion Probabilistic Models (Lugmayr et al., 2022): diffusion applied directly to inpainting.